Category Archives: AirwayHowTo

Dual endoscopy

“Dual endoscopy” refers to using two devices – usually a video laryngoscope and a rigid or flexible endoscope – to manage an airway.  The Bonfils (or Shikani or Levitan) optical stylet is often used in this context.  Performing dual endoscopy provides “three levels of protection”:

  1. If the glottic opening is easily seen with the laryngoscope, the rigid endoscope simply acts as an ideally shaped or steerable stylet to introduce the tube
  2. If the view is poor (CL grade 3 or 4), the laryngoscope can be used to guide the tip of the ETT and endoscope “into the ballpark”, and then the final positioning of the tip of the tube through the vocal cords is achieved with the endoscope.
  3. If the airway is badly soiled or swollen (eg. ongoing bleeding or angioedema), the endoscope can be used as a lightwand for a transillumination technique.  (Remember lightwands, anyone?)

Here’s a brief informal video explaining the first two points, using the CMAC VL/VS:

Another dual endoscopy approach is “VAFI” (video-assisted flexible/fibreoptic intubation), where a VL is used to help place a flexible endoscope, whereafter the rest of the intubation is continued using the flexible.  Several good case reports of this technique are described in the literature.

Here’s a brief clinical example of dual endoscopy using the CMAC VL and VS (video stylet).  This case was performed for teaching purposes, rather than a difficult airway.  Note the endoscopic view appearing as a picture-in-picture is from the editing; the images are on two separate displays.  (It starts a little late due to the author forgetting to press the record button on the device).


Some of the newest devices (eg. CMAC 8404; Glidescope Core monitors) allow both images to be displayed on the screen simultaneously, either as a “picture in picture” view, or side by side. If using the latter, orientating the images so that the VL is on the left and endoscope on the right is convenient, as this matches the two hands being used. Here’s an example, again in a patient with an easy airway, but simulating CL3 view:
Dual endoscopy using CMAC3 and Bonfils. It would have been good to have warmed the Bonfils before starting, to prevent the fogging of the distal lens.

Should you use an introducer (bougie/stylet)?

While many of us would think this is a daft question, when we went hunting for high-quality evidence, it was not very forthcoming.  Hence:  science to the rescue!  Watch a brief (<120 second) overview of the study:

Kirsten Kingma and Ross Hofmeyr give a #litbit overview of their paper published open-access in Emergency Medicine Australasia comparing intubation with different introducers in a simulated easy and difficult airway.

What’s the bottom line?  We should always be using and introducer (bougie or stylet) when approaching a predicted difficult airway, and possibly for any emergency or rapid-sequence intubation… at least in manikins!  What’s needed next?  A robust RCT…

AirwayHowTo: Clean a CMAC VL

If you work in an environment without constant access to staff to clean and process your video laryngoscopes, you need to know how to do it yourself. This quick video demonstrates pragmatic cleaning of the C-MAC VL (original and latest version) for low-risk patients. Where there is high infection risk, heavy soiling or blood on the blades, high level disinfection may be indicated.

Airway topicalisation: How to make the GSH mix

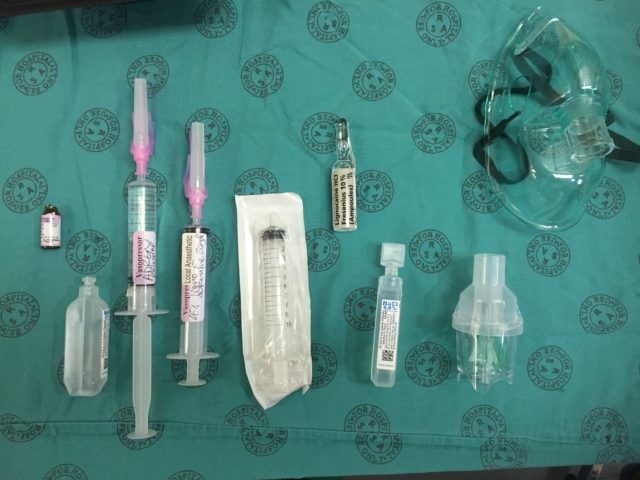
There are many ways to adequately topicalise an airway, which depend on personal and institutional experience, and the available drugs in different parts of the world.   This is a step-by-step set of instructions on how to make the “GSH Mix” in use at Groote Schuur Hospital, Cape Town, South Africa.  Note that we don’t have access to certain ingredients which are commonly available elsewhere (such as viscous lignocaine or Moffett’s solution).

End product:  4 % (or 5%) lignocaine with 20 mcg/ml adrenaline.

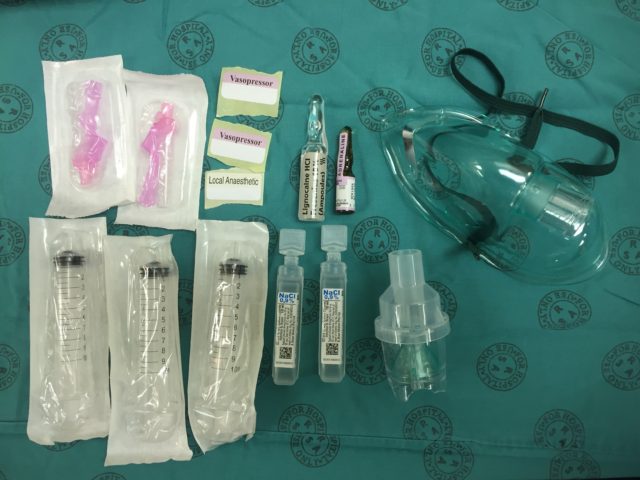
You’ll need:

  • Three 10 ml syringes
  • Needles to draw up drugs
  • Syringe labels and marker pen
  • 5 ml 10% lignocaine (‘Remicard 10% in SA)
  • 1 mg/1 ml adrenaline (1:1000)
  • Two 10 ml normal saline ampoules to dilute
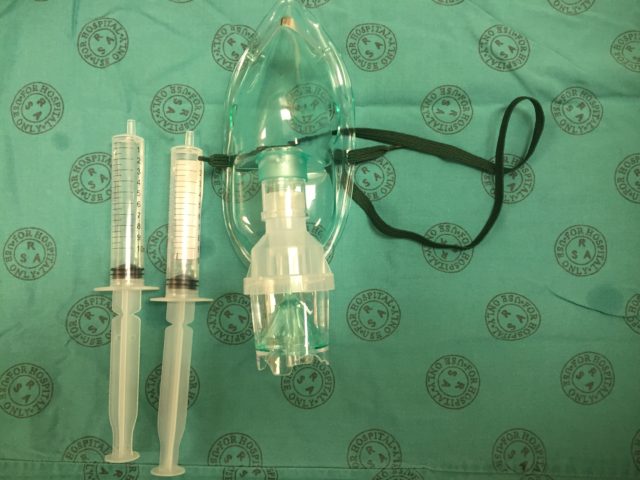
  • Nebuliser mask

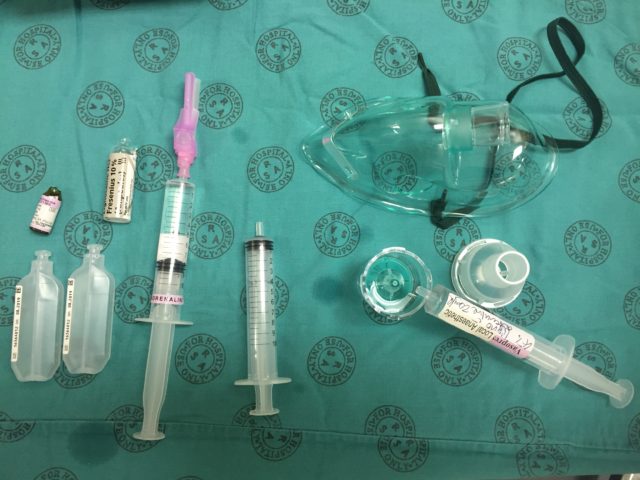
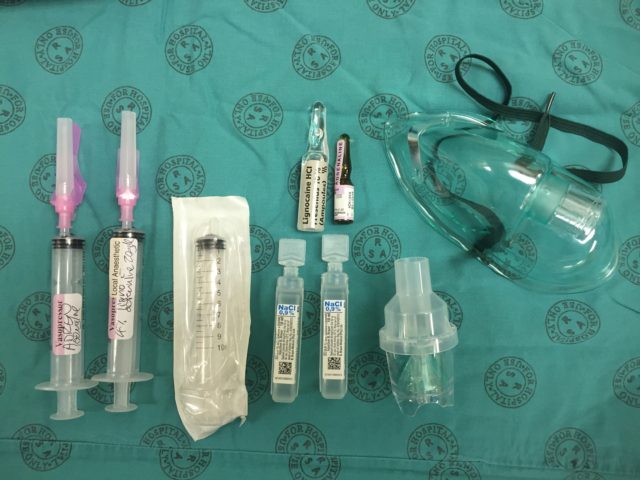
Label the syringes clearly:  100 mcg/ml adrenaline (1:10 000) and 4 % lignocaine with 20 mcg/ml adrenaline:

Draw the adrenaline (1 mg/1 ml) into the adrenaline syringe, and dilute with saline to 10 ml (100 mcg/ml, or 1:10 000 solution):
Transfer 2 ml (200 mcg) of the dilute adrenaline into the mix syringe: Add 4 ml of the 10 % lignocaine solution to the mix syringe (use all 5 ml if you want to make a 5 % solution rather than the usual 4 %): Add saline to the mix syringe to a total volume of 10 ml.  You now have 4 % (or 5 %) lignocaine with 20 mcg/ml adrenaline: Put 5 ml of the mix into the nebuliser mask, ready to commence topicalisation by neb: Split the remaining 5 ml mixture into two 10 ml syringes (using your third syringe) to be used for spray-as-you-go through the scope if needed:
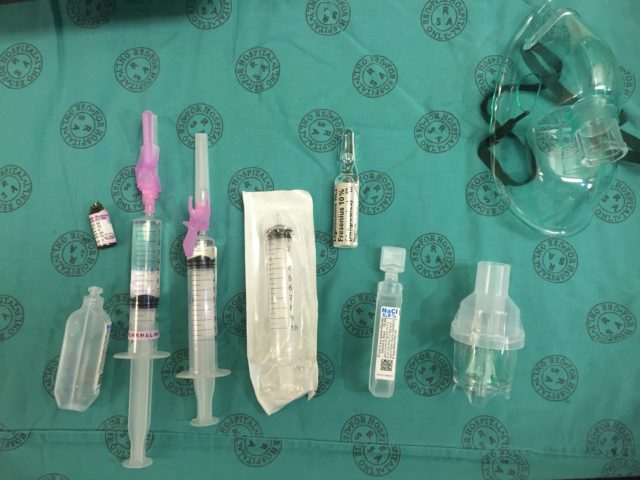
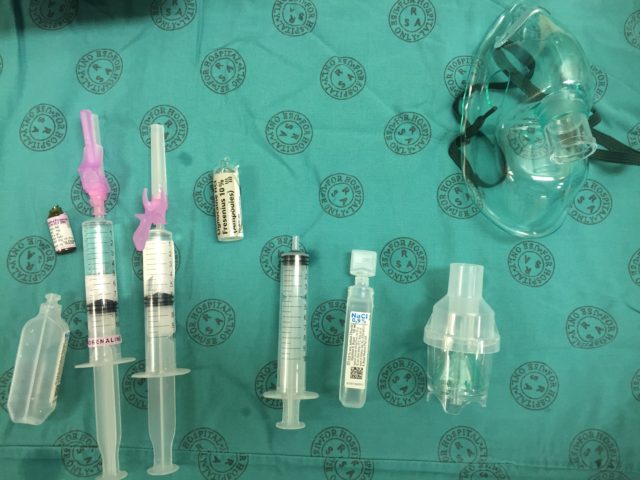
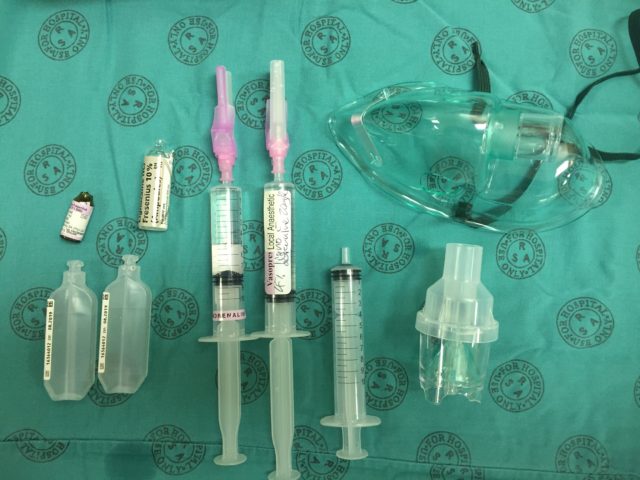
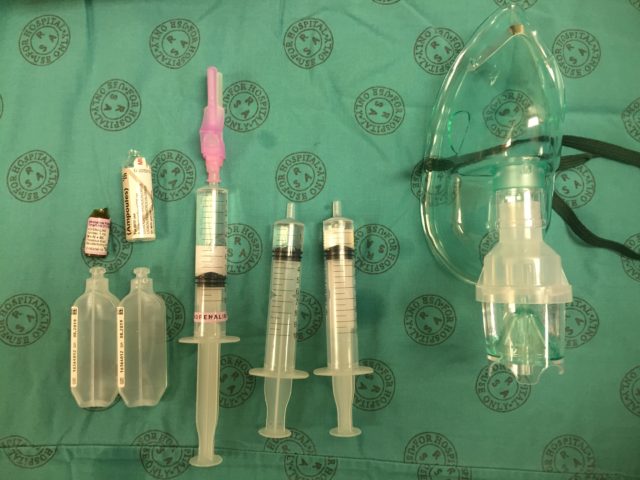
Put the rest of the adrenaline solution somewhere safe (or discard it), and draw back the plungers on the mix syringes all the way.  This introduces air which then blows the local mix through the scope when you do spray-as-you-go.  Don’t forget to give the neb plenty of time to work (15-20 minutes, until complete). Don’t forget to use adjuvant strategies to improve your topicalisation, such as gargling, atomised spray, or topical gel/paste, and enter your cases into a registry such as TheAirwayApp so that we can build worldwide experience with different techniques!
Understanding airway geometry: Brainchildren of Dr Kenneth Greenland

One of the greatest influences on my understanding of the geometry of the airways, and thereby the technical skills and processes required to place airway devices of all types, has been the work on publications of Dr Kenneth Greenland. Greenland’s publication in the BJA in 2010 should be required reading for anybody who performs intubation. However, if you want to really understand theories of the airway curves and columns, I highly recommend getting it from the horses mouth.  Here below are several videos in which can Greenland explains his thinking and theories.  While they are a little longer than your average #FOAM material, I cannot recommend them strongly enough.

How to build a breathing, bleeding cricothyroidotomy simulator

Jean-Christopher Ozenne (@JCOzenne) of Gouvieux, France has generously published this great video on how to build “The Mustache” – a breathing, bleeding cricothyroidotomy simulator – using cheap and ubiquitous equipment.  Can’t wait to try this one out…I particularly like the artistic touch.  To paraphrase V himself:  A cric trainer without bleeding is not a cric trainer worth having.

Bronchial blockers: EZ-Blocker

Herewith a quick tutorial on the use and placement of the bifurcated, dual-balloon ‘EZ-Blocker’ bronchial blocker.  More videos on the DLT vs BB debate, the other blockers, and troubleshooting advice to follow.  Comments welcomed as always!

Basic fibreoptic/flexible scope skills video

Another quick training video, on the basic techniques of driving a flexible scope (fibreoptic or video) for intubation.  This was made specifically as a primer for people in our own department taking part in a training study, but hopefully it is useful to a larger audience!

Please put your comments and (hopefully constructive) critique below.   As always, you’re welcome to use with attribution!

The permanent page for this video can be found here.

Video: Surgical cricothyroidotomy (DAS 2015)

Quick overview of the surgical cricothyroidotomy technique as presented in the 2015 Difficult Airway Society guidelines.  This is simply presenting the technique in a manikin model, not intended as a debate about the relative merits of needle vs. surgical, blade vs. hook, scalpel-finger-bougie vs. scalpel-bougie-tube, etc!

Don’t forget to wear your PPE (gloves, mask, eye protection) and appropriately secure the tube afterwards.

As always, constructive criticism and suggestions for improvement are always welcomed in the comments section.

Video: Aintree intubation technique

Technique for using the Aintree Intubating Catheter (AIC) to exchange between a supraglottic airway (SGA) and endotracheal tube (ETT).  This is typically required when an airway has been ‘rescued’ with an SGA that is not designed for direct intubation, with a narrow internal diameter or obstructions.  The Aintree has a length of 55cm, internal diameter of 4.8 mm (not 4.2 as stated in the video) and external diameter of 6.0 mm, allowing a paediatric fibrescope or flexible intubating vide endoscope (preferably 4 mm or less) to be passed through the AIC, into the trachea, and then an ETT railroaded after removal of the SGA over the AIC.  If that sounds confusing, watch the video!

Tips/tricks/advice/critique?  Leave a comment!

The Difficult Airway Society (DAS) have a nice poster guide to help you remember how to do this – click the image below to open/download. (Open access).

DAS AIC Guideline - Click image to download PDF directly.
DAS AIC Guideline – Click image to download PDF directly.

AIC_abbreviated_Guide_Final_for_DAS